When you or other staff are working on cases, it is always best to make sure cases do not fall through the cracks. A great way to utilize screen flows is to display them directly on a lightning record page. What we are going to build is a screen flow that will sit in the side column of the lightning record page of cases. It will display key information on a case that is assigned to you such as type, account, and contact. It will also have a direct link to that case which is clickable.
Urgent Case Display Flow
Get Case
Add a text variable called recordId to keep the default value blank. Create a get element for cases which is getting a single value and set the criteria as follows Status to New, Owner equals $User.Id (Current User In Flow) and Id do not equal recordId (The variable we just created). Next, we will set the sort order to Descending and use CreatedDate as the ordering field. Select Choose fields and let salesforce do the rest. Select the following fields to store CaseNumber,CreatedDate,Type,ContactId and AccountId. Create a formula for the id name the formula URLForNextCase and date type as Text then set the formula as below.
"/" + {!Get_Next_Case.Id}Get an Account and Contact
We have previously retrieved the ContactId and AccountId on the case. So we will do two individual gets for these using retrieved variables of the ids of both to filter. We will retrieve the Name field from Contact and Account.
Records Found?
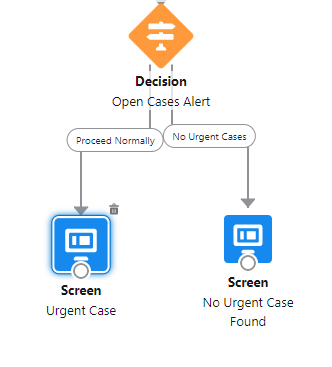
We will create a decision based on whether it finds a case or not. If it does not return any values in the case we want to take it to a screen to notify them that they do not have any urgent cases. If a case is retrieved it will display the details for that case. The criteria Single Case Variable is Null {!$GlobalConstant.False} and call this decision Proceed Normally. Rename the default outcome No Urgent Cases.

Proceed Normally
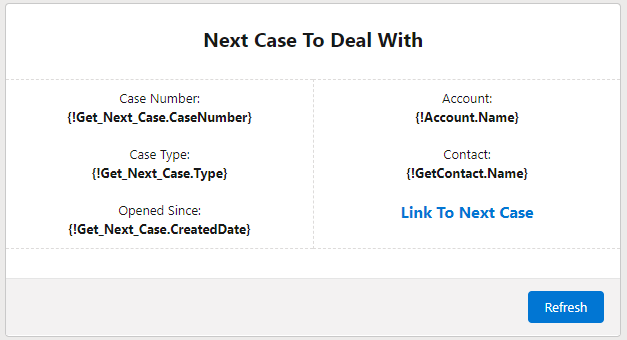
Create a screen element add a section and add two columns of Half-Width. In the first column add a text display and add headers and variables for Case Number, Case Type, and CreatedDate. Now in the second column add a text display with the account name and contact name. Lastly, add text saying “Link to Next Case” highlight this, and add a link to set the link to the value {!UrlToNextCase} formula we created. Configure the footer buttons to hide Pause and Previous and rename the Finish button to Refresh. Hide the header in configure header.

No Urgent Cases
Create a screen element and a display text field. I have enlarged the first line and set the colour as green saying “No Urgent Cases Found”. Next, I have written a message “You do not currently have any urgent cases in your queue. Continue to work as normal.” As above configure the screen header and footer the same.

Adding To Case Lighting Record Page
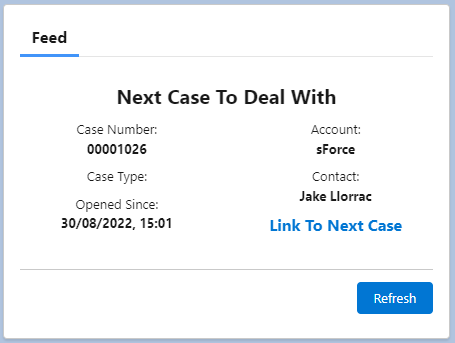
Go to the lightning page you will use to search for flow in the component search. Drag this onto the page where you want to display it I have put it on the sidebar on my layout. Select the flow name go down the recordId and check the pass record ID into this. Save and Activate the page. Now go to a case, and it will be there see below as a reference to how I have it set out.

Next Steps
Now, that this has been built and deployed you may want to work on multiple things on this. Like, such as changing the criteria using priority, filtering it down by specific case types, and bringing extra fields to the display. I will probably revisit this at some point in the future so keep your eyes peeled you can find other projects here