Campaigns are the single best way of tracking how well your ROI for generating leads is. Sending auto responders is a great way to warm up a prospect. I’ve always found that if you combine these, you will kill two birds with one stone or kill two automation pieces with one Flow if you may. I assume that you will probably be using a workflow with an email alert for the autoresponder and a process builder to create the Campaign and send the email at the moment. We are removing these and streamlining this automation.
Solution
To build this we only need one Flow. If you are building this in a developer org you may not have an email alert so you will need to build one. The Flow will look up the Id field on a lead and find the correct Campaign to add it to. We will need to create three campaigns for this name SEO, Social, and Referral. We will now jump right into this we need to add the following values to lead source SEO, Social, and Referral.
Flow
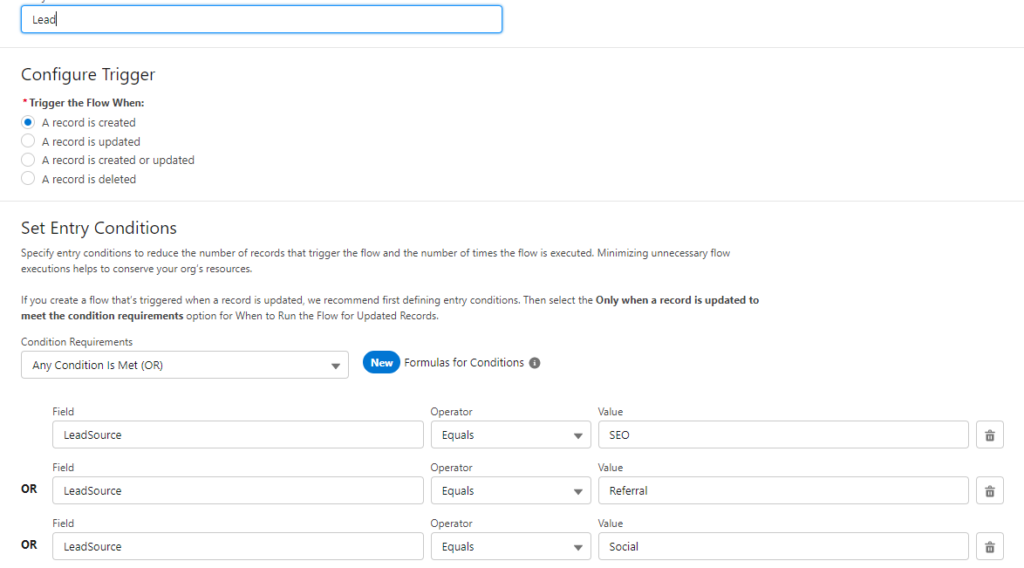
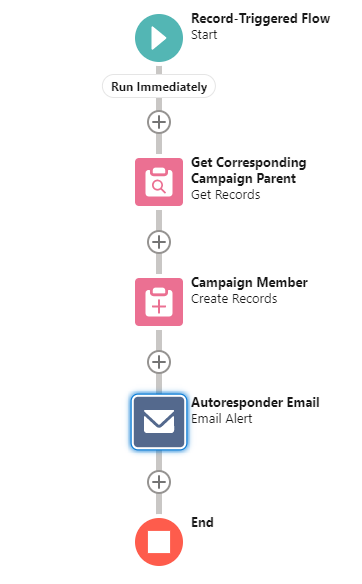
First, create a new flow that needs to be a Record-Triggered Flow. Set the object to Lead. Then set it to be triggered when the record is created. Set the Lead Source to equal SEO, Social, and Referral. Finally, set the Optimize the Flow for: section to Actions and Related Records.
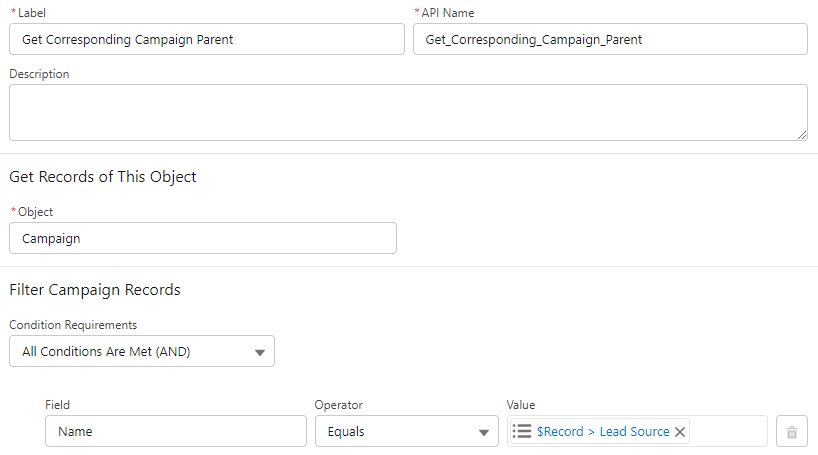
Get Campaign Id
We need to create a Get element set to Campaign as the object. In the criteria, we will set this to the Campaign Name to match the record lead source value. We only need to retrieve the Id and save this.
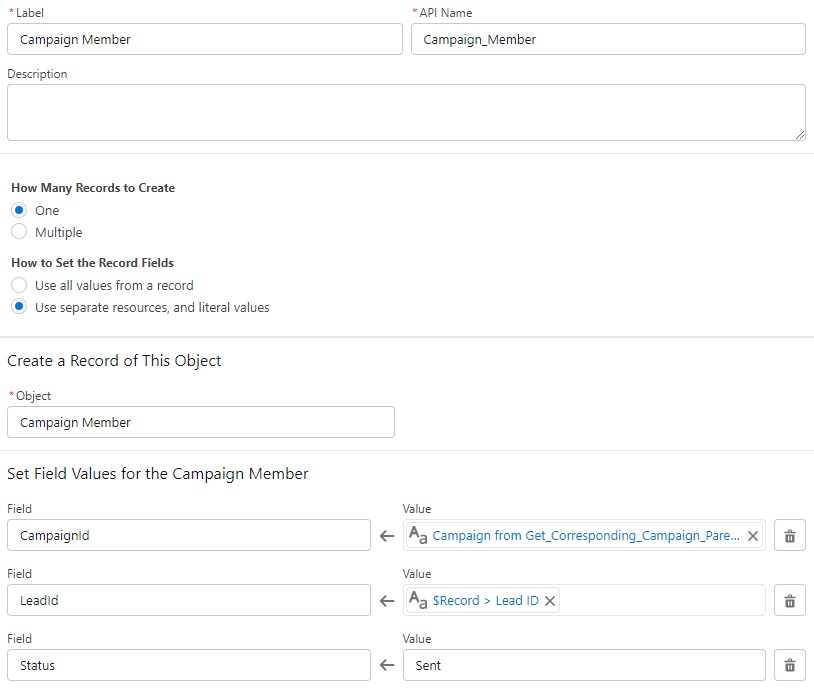
Create Campaign Member
Now we have the Campaign Id. We need to make a Create element selecting individual values. The object will need to be a Campaign Member. Now we take the retrieved Id from the Campaign to populate the Campaign Id field on the Campaign Member. Set the status to Sent, as we will send an email autoresponder after this. Finally, set the Lead to equal the record Id. Save this, and this concludes the Campaign Member Section Of the Flow.
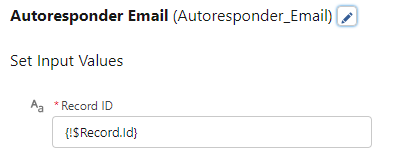
Action: Send Autoresponder
Select Action from the resources and search the email alert you have for this. If you have created one, put the name in this. Please select it and fill out the labels. Set the Record Id to the {!Record.Id}, which is the Lead Id. If you do not see the email alert check, it is named what you are searching for. If you cannot still see it. You will need to save the Flow entirely and refresh the page to start again. (It could have been that you opened the Flow before the email alert was created).
Testing
When you activate this Flow you need to create three leads. Each Lead needs to be one of the three Lead Source options we added at the start. If these are successful, the email recipient will receive an email, and the corresponding Campaign will have a campaign member added to it. If you haven’t received this email, check that deliverability is active in the org and is set to Full deliverability. (See here for full details about deliverability). If you are using a developer org, you have a low daily email limit so you may hit that limit testing this.
Next Steps
You have basically created a New Lead Process so from here you can add additional pieces of automation and replace the soon-to-be-retired Workflows and Process Builders. As far as I’m aware these will be retired at the end of this year (2022) and early next year (2023) for the process builders. I will be releasing some side-by-side how-to guides for designing flows to replicate Workflow Rules and Process Builders. For comparison of features ,you can find articles for Workflow Rules and Process Builder