Following on from replacing simple triggers with before-save flows. Well, great news! You can also replace more complete triggers with after-save flows, though these types of flows are not as lightweight as before save. The flip side to that is that what you can do with these flows is far greater in terms of capability allowing CRUD. The reason I am going through this is that dependent on your admin/development team. Members of your team may not currently have the knowledge or know-how to work with triggers.
Trigger To Replace
We will again use an example on Salesforce Trailhead found here. I have included the example below. This checks an account after it is created or updated. Next, if there is a related Opportunity then it updates the created one related.
trigger AddRelatedRecord on Account(after insert, after update) {
    List<Opportunity> oppList = new List<Opportunity>();

    // Get the related opportunities for the accounts in this trigger
    Map<Id,Account> acctsWithOpps = new Map<Id,Account>(
        [SELECT Id,(SELECT Id FROM Opportunities) FROM Account WHERE Id IN :Trigger.New]);

    // Add an opportunity for each account if it doesn't already have one.
    // Iterate through each account.
    for(Account a : Trigger.New) {
        System.debug('acctsWithOpps.get(a.Id).Opportunities.size()=' + acctsWithOpps.get(a.Id).Opportunities.size());
        // Check if the account already has a related opportunity.
        if (acctsWithOpps.get(a.Id).Opportunities.size() == 0) {
            // If it doesn't, add a default opportunity
            oppList.add(new Opportunity(Name=a.Name + ' Opportunity',
                                       StageName='Prospecting',
                                       CloseDate=System.today().addMonths(1),
                                       AccountId=a.Id));
        }
    }
    if (oppList.size() > 0) {
        insert oppList;
    }
}
Replacement Flow – After Save Flow
Setting The Flow
Pretty straightforward forward it’s essentially a record-setter function, so we will go through doing these in Flow builder.
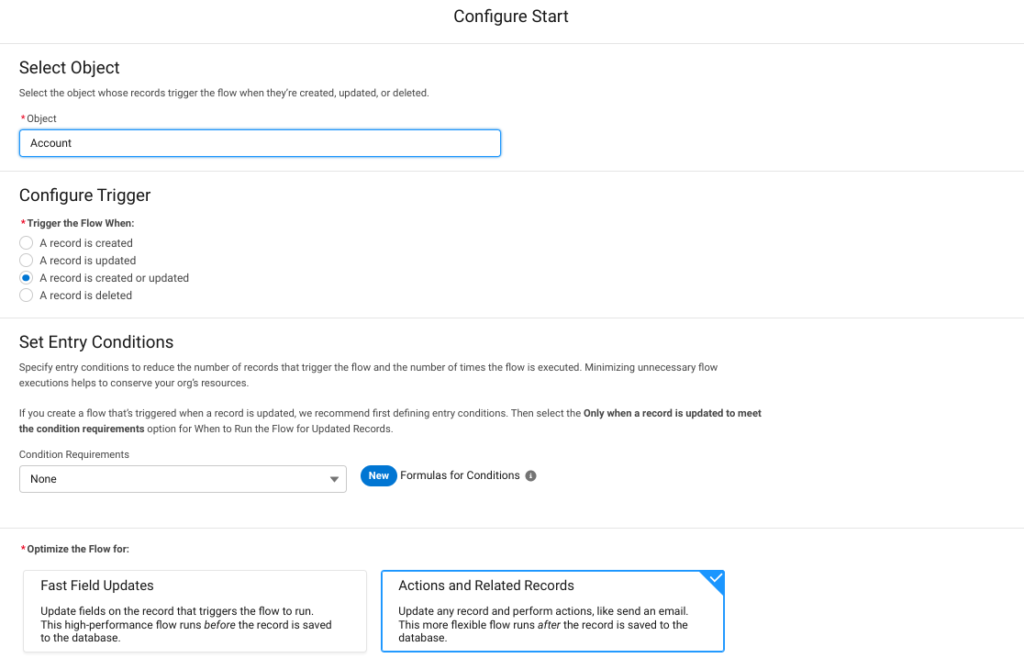
- Create Record Triggered Flow.
- Set Object To Account.
- Next set To When Created or Updated.
- Select Actions and Related Records.
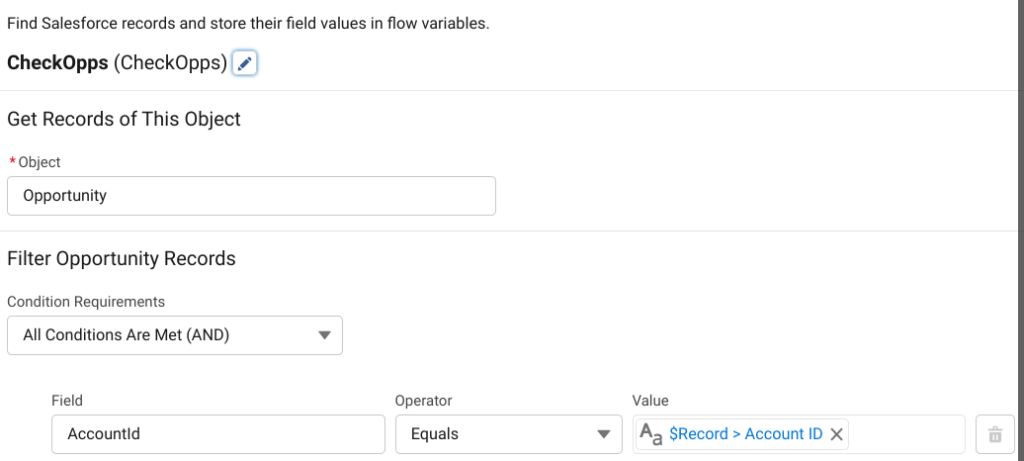
Get Record (Opportunity)
Next, we will create a get element that will check for opportunities related to the account which is triggering the flow.
- Name it CheckOpps.
- Set object to Opportunity.
- Set Criteria to Account Equals {$Record.Id}
- Leave the rest of the element.
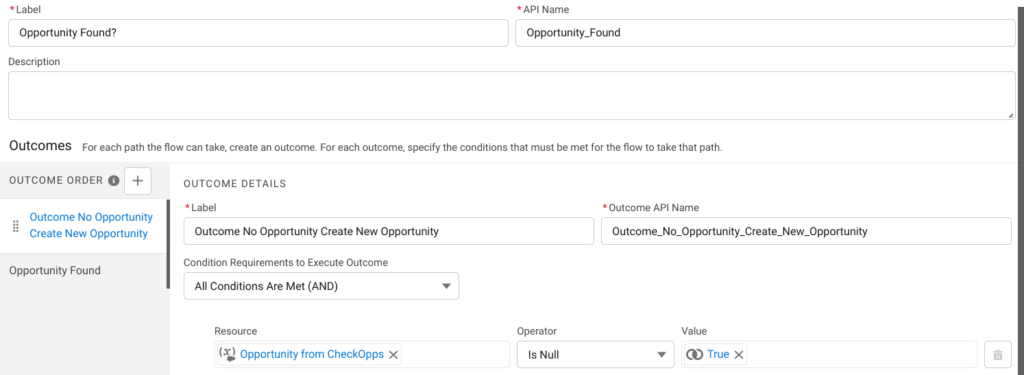
Decision Opportunity Found?
Change the first outcome to No Opportunity Create New Opportunity set the criteria to CheckOpps is null True. Rename the default outcome to Opportunity Found and click save.
Outcome No Opportunity Create New Opportunity
As there is no related opportunity on this record we will create one with four fields filled out depending on how you have the org you are using set up may have to include additional fields for the record to create.
- Create a create element on the No Opportunity Create New Opportunity Path.
- Set object to Opportunity.
- Use separate resources and literal values.
- Set field Name with the value of $Record.Name + ‘ ‘ + Opportunity
- Next set field Stage with the value of Prospecting.
- Then set field Account with the value of {$Record.Id}.
- Lastly set field CloseDate with a value of Formula NextMonth (See Below)
Formula for NextMonth
The formula wants to take today’s date and add a month to it.
ADDMONTHS(TODAY(),1)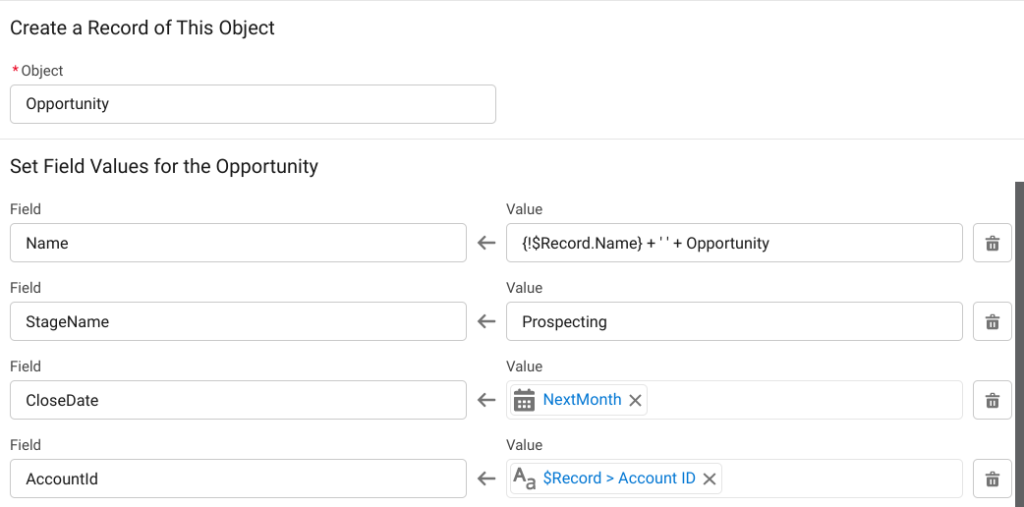
Outcome Opportunity Found
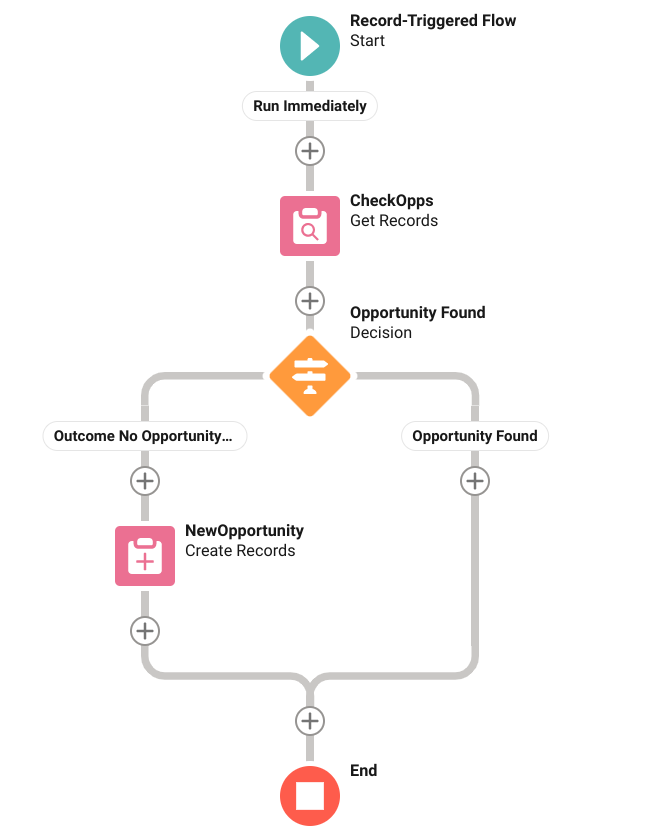
This will be the default outcome path, and you won’t need to create anything on this path. The path will lead to the endpoint. Now you have created this the flow should look like the image below.
Activating and Testing
Now we have built this all you need to do is test it through the debug menu before deploying the testing update. Once you are happy with it set it to active, and test it a few times in the org for good measure. To test it you will need to create or update an account in your org. Test one which already has an opportunity attached and tests another which doesn’t.
Further Learning
Now you have this in place why not do some of my tutorials? If you are looking for things on the easier end of scale check out articles under beginner friendly. Feeling up for something to get your teeth stuck into check out the multi-object record distributor project which is made up of several articles as you build it out.