Multi-Object Distribution Part Links
This part of the tutorial will take care of the creation of new containers and activation of them. We will also connect our user management flow as a Subflow to make this all work as one piece for management. We first need to formula field on the distribution container.
Create the type as text and call it Management Display. Copy the below formula into the formula section. If you have followed this perfectly when you check syntax you shouldn’t have an error.
Name & " - " & IF(Active__c = TRUE,"Active","Inactive") & " - " & "Users: " & TEXT(Number_Of_Users__c)If you do have an error a quick explanation of this formula. It takes the following fields from the container object, Name, Active, and Number of Users (Rollup field). Having completed this we will now move on the flow. The flow for this part will look like the below.
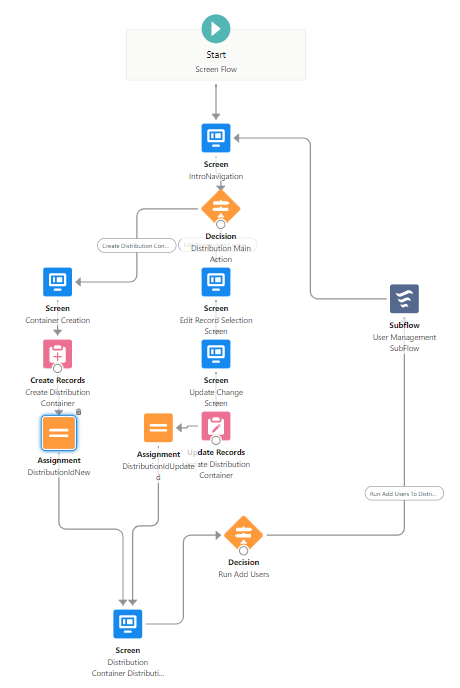
Action Screen
Right at the start of the flow, you will need to create a screen that handles management options. On this screen create a picklist that holds two choices of “Create Distribution Container” and “Edit Distribution Container” name the picklist Action. Next, create a decision that will handle these options and create two paths one for each option.
Create Distribution Container Path
We need to create a screen element for this which has a name and a checkbox to add users. The name field is a text field and will be assigned to the Name of the distribution container on creation.
Next, create the create records element select object as Distribution Container set the variable from screen to be assigned to the name value on the distribution container. We will pass the created record id to the DistributionId.
Edit Distribution Container Path
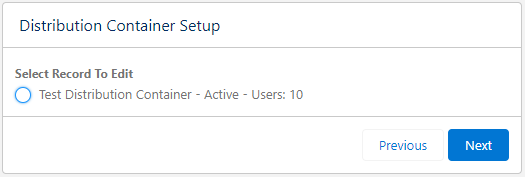
You should create a screen element with a picklist set as radio buttons. (I personally prefer the visibility of records this way, If you want to use drop-down feel free to do so). Create a record choice set and use the Distribution Container as the object. Use the display label Management Display and the value Id for these records. This will look like the one below when it runs.
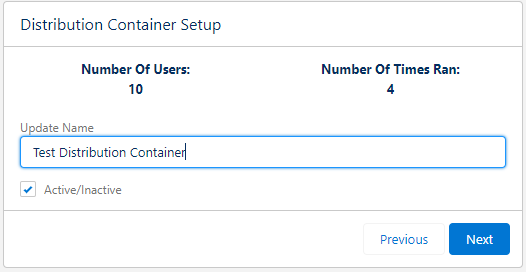
Next, we will create a second screen that will hold the existing information and be available to edit. The name field and Active/Inactive check will be the only two fields that are edited by the user. In addition to these Number of Users and the Number of Times Ran will be set as text display values. I have formatted them inside a half-width section to hold each value. This will look like this.
Lastly, for this path, we will create an update records element using the Id from the “Select Record To Edit” picklist option. Assign the values manually on this for the name and active fields on the distribution container. Next, we need to create an assignment to update a text variable we will pass DistributionId the id from the picklist selection value.
Add Users Screen
Add a new screen and connect both the paths to them call the screen Add Users and add a checkbox for Add Users To Distribution Container and add a decision off the back of this which will run the Subflow for users. Call in the Subflow for User Management toggle the variable for DistributionId and put in the DistributionId. Now you have finished this run and tested this.