Multi-Object Distribution Part Links
Initial Setup
Before we start building the flow out we need to create these Variables which are crucial to the flow. They are all text types. Distribution needs to be available for outside flow usage as the id is going to be passed through this.
| Variable | Type | Purpose | Input | Output |
| DistributionId | Text | Holds Distribution Container Id | TRUE | TRUE |
| NewTextUser | Text | Hold Single Value | FALSE | FALSE |
| TextUsersToLoop | Text | Holds Array From Multi Checkbox | FALSE | FALSE |
Set Up Users
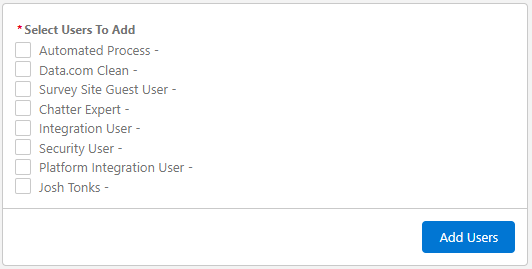
We need to create a Record Choice Set of users. Filter this by active users with the label of the user’s full name and id as the value.
- Create a screen element with the name Set Up Users this will be the only screen on this flow.
- Create a Multi Picklist of Select Users To Add with the record choice set we have just created as the value.
- I always try and remove the pause and previous buttons on screens where they are not needed.
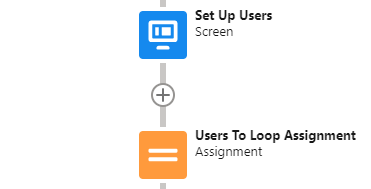
We will now assign the Select Users To Add field component to TextUsersToLoop variable we created. Next on the next line of the assignment, we will add a semicolon to the end of the TextUsersToLoop. Your flow should look like the following image.
Decision – Is TextUsersToLoop empty?
Create a decision we want to check if TextUsersToLoop has values to process so we will be setting to TextUsersToLoop Is Null False and Name the decision Text Users To Loop Not Empty. Next Name the default outcome to Text Users To Loop is Empty this will act as our divide between record creation and exit path.
Create a Collection Object Variable for Distribution Users object. Create an element and add it to the Text Users To Loop Is Empty Path. This will be the endpoint. We will now set up the formulas for the Not Empty Path.
Handling Multiselect Picklist With Formulas
I have found the best way to handle an array from a multi-select picklist is to use the below formulas. I recommend following the naming convention in the tutorial, but you may want to change the merge names based on your naming convention in future projects.
ParseFirstValue
This formula takes the array of text we have passed from the multi-select picklist. Takes the first value before the semicolon then removes the semicolon which is then passed to a text variable that will only hold one ID at a time.
TRIM(LEFT({!TextUsersToLoop},FIND(";",{!TextUsersToLoop})-1))RemoveFromArray
This formula looks at the array and removes the value plus the following semicolon which allows the array to be reassessed with the next value for the loop.
TRIM(
SUBSTITUTE(
{!TextUsersToLoop},{!NewTextUser}+";",""
)
)
Assignments
We will not use the loop element for this because it isn’t a collection so after creating those formulas we will use them below.
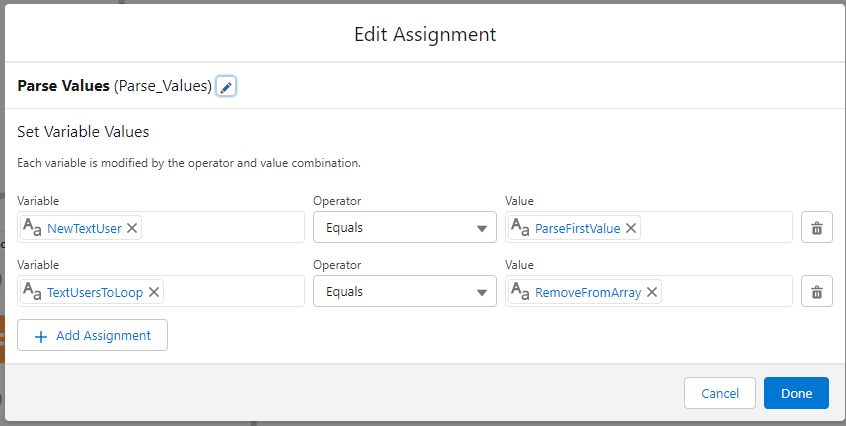
Parse Values
Firstly set the Variable as NewUserText Equals ParseFirstValue. I previously mentioned this will get the first value in the array. Next in the same assignment set the second line set variable to TextUsersToLoop Equals RemoveFromArray. This will update the array so that when we loop round we can check it again. I have included photos for clarity.
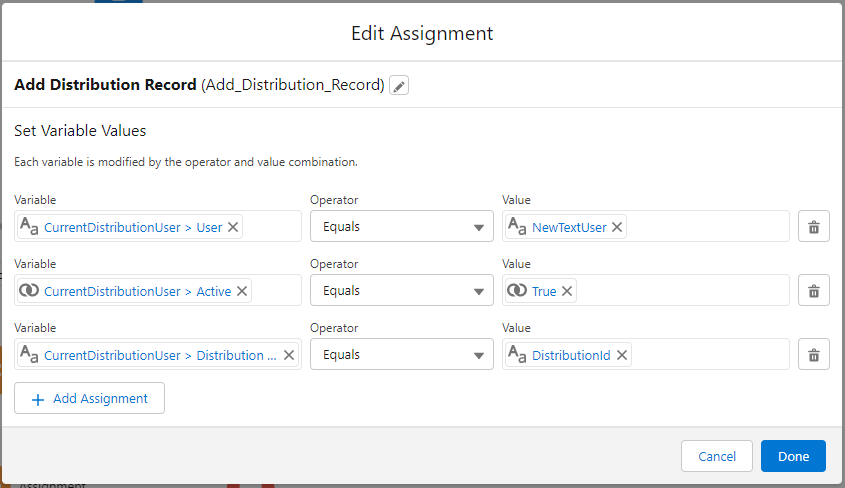
Add Distribution Record
Create a Record (Single) Variable for Distribution User named CurrentDistributionUser. Set the following required fields as follows User Equals NewTextUser; Active Equals True, Distribution Container Equals DistributionId.
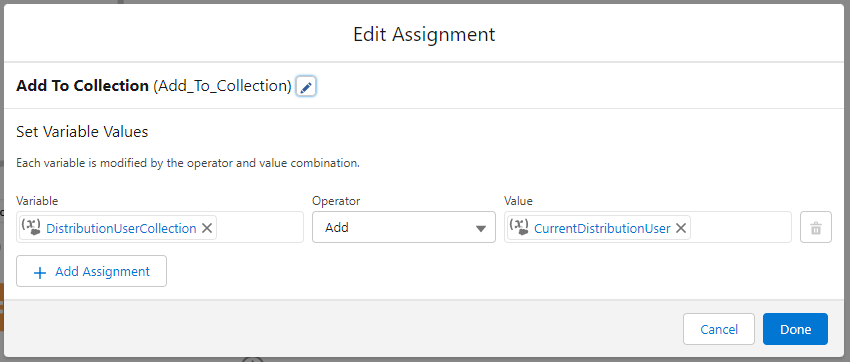
Add To Collection
The final assignment is straight forward we will be adding the single record CurrentDistributionUser to DistributionUserCollection. Set the variable to DistributionUserCollection Add CurrentDistributionUser as represented below.
So now we are taking the first value of the array and assigning it. We will then create the distribution users in the collection we are adding it to. To loop this we need to click the plus to add an element. Select Connect Element and select the IsLoopEmptyDecision.
Wrapping Up
Now you have done this get the test record we created in the earlier tutorial click debug and put the value in the DistributionId field. Select a few users you want to add to the screen. If you have got it correct you wont get any errors. You will be able to go to the test record and see the new Distribution Users. In the next tutorial, we will add a number assignment for the distribution users, using a loop.